Creating EC2 Using AWS CLI
Create EC2 using AWS CLI
- From the network infrastructure created with CLI, we will create EC2. First, create AWS Key pair
aws ec2 create-key-pair --key-name MyKeyPair --query "KeyMaterial" --output text > MyKeyPair.pem

- Check on the interface; we confirm that we have successfully created Key pair

- Use the command to decentralize:
chmod 400 MyKeyPair.pem

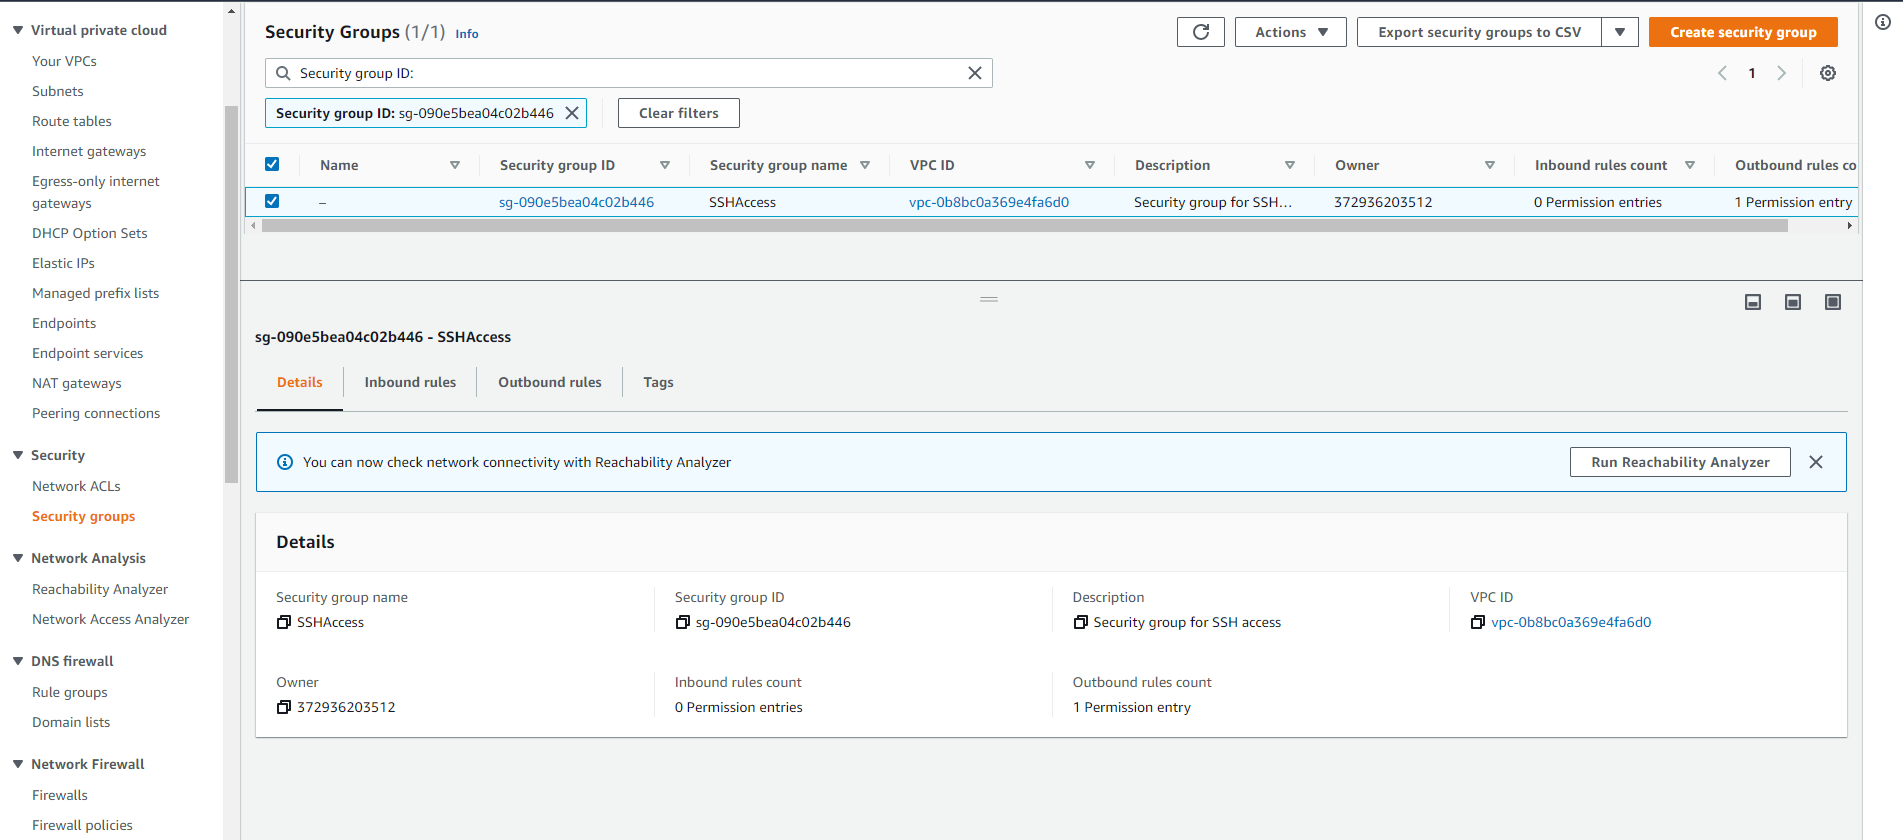
- Create Security group for EC2
aws ec2 create-security-group --group-name SSHAccess --description "Security group for SSH access" --vpc-id **VPC ID**

- Then, we check the created Security group.
- Make permission to SSH:
aws ec2 authorize-security-group-ingress --group-id **SG ID** --protocol tcp --port 22 --cidr 0.0.0.0/0

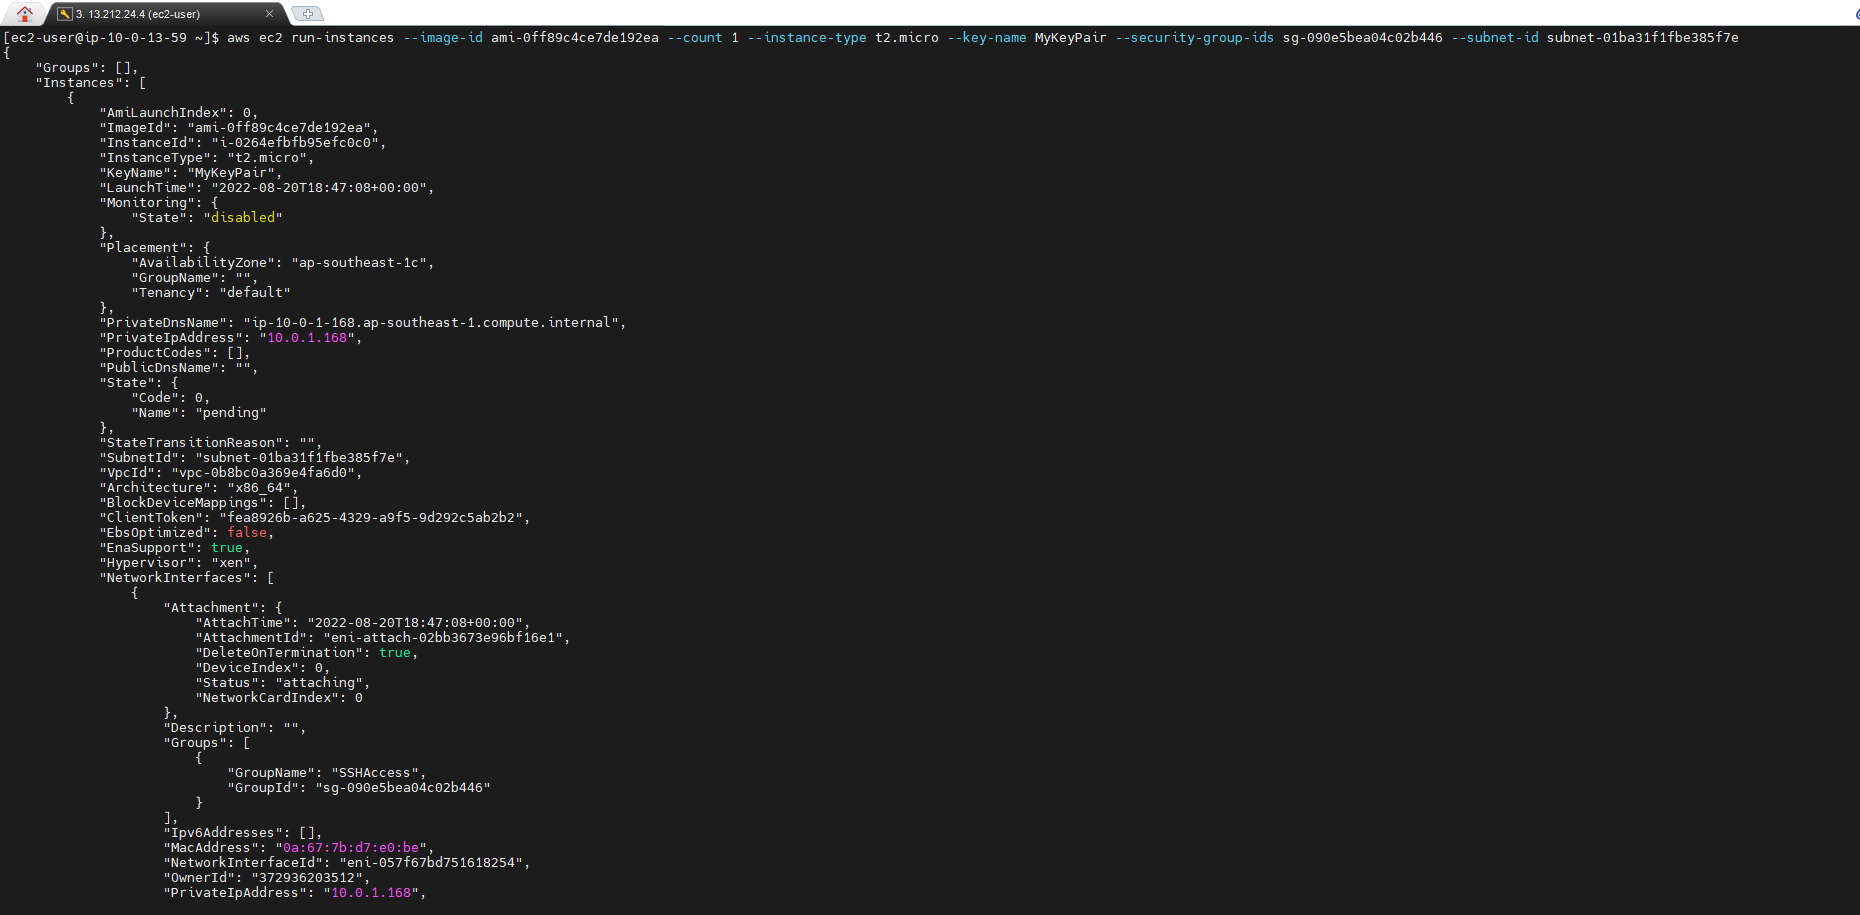
- Preparation is complete. Let’s start EC2
aws ec2 run-instances --image-id **AMI** --count 1 --instance-type t2.micro --key-name MyKeyPair --security-group-ids **SG ID** --subnet- id **Subnet ID**
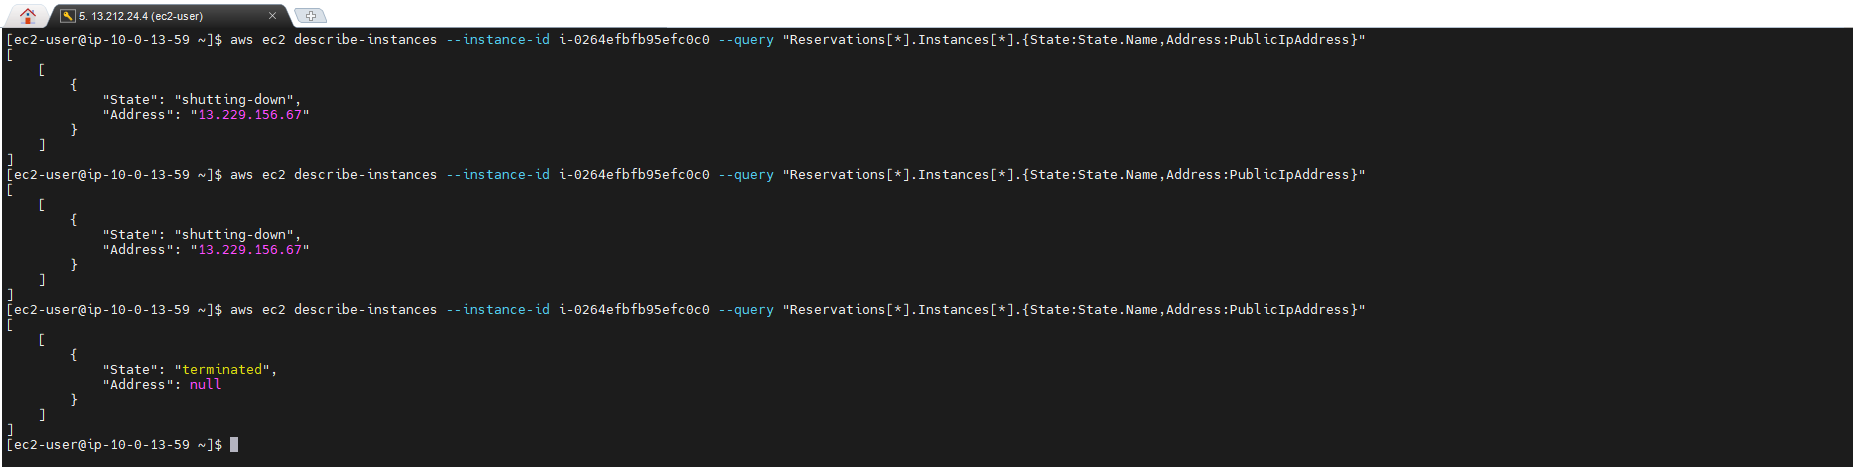
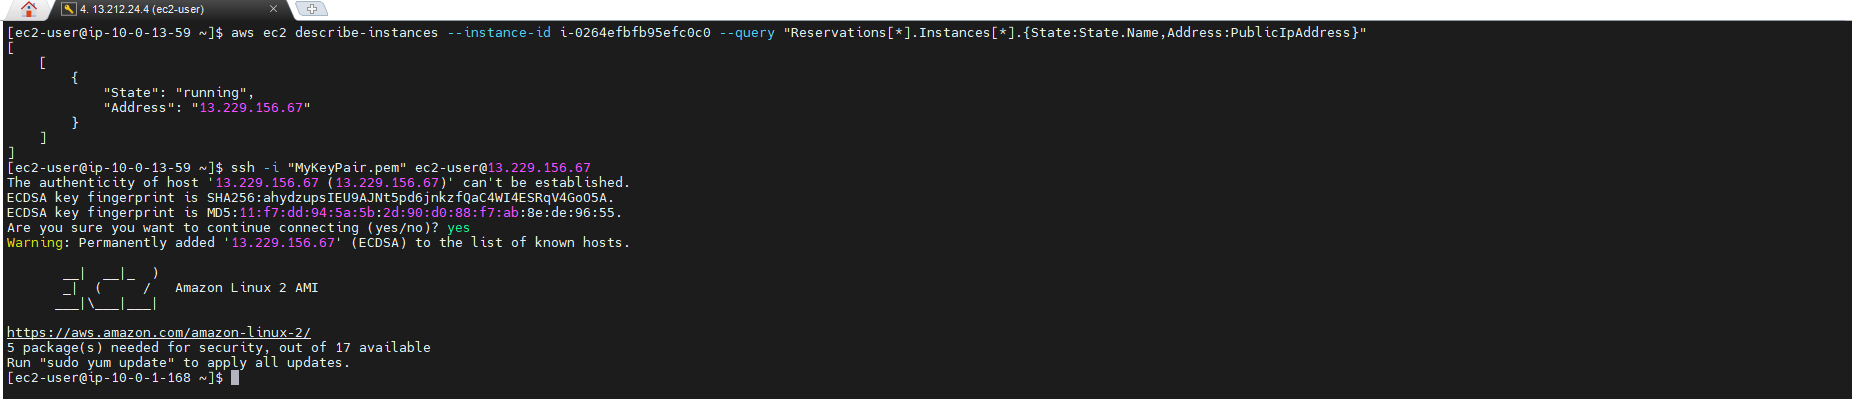
- Wait about 2 minutes, see the status of EC2 instance
aws ec2 describe-instances --instance-id **Instance ID** --query "Reservations[*].Instances[*].{State:State.Name,Address:PublicIpAddress}"

- When the instance is in running state. We make the connection
ssh -i "MyKeyPair.pem" ec2-user@IP Public
- Once used, we execute terminate with the command:
aws ec2 terminate-instance --instances-ids **Instance ID**

- After about 2-3 minutes later. We check the status of instance